![]()
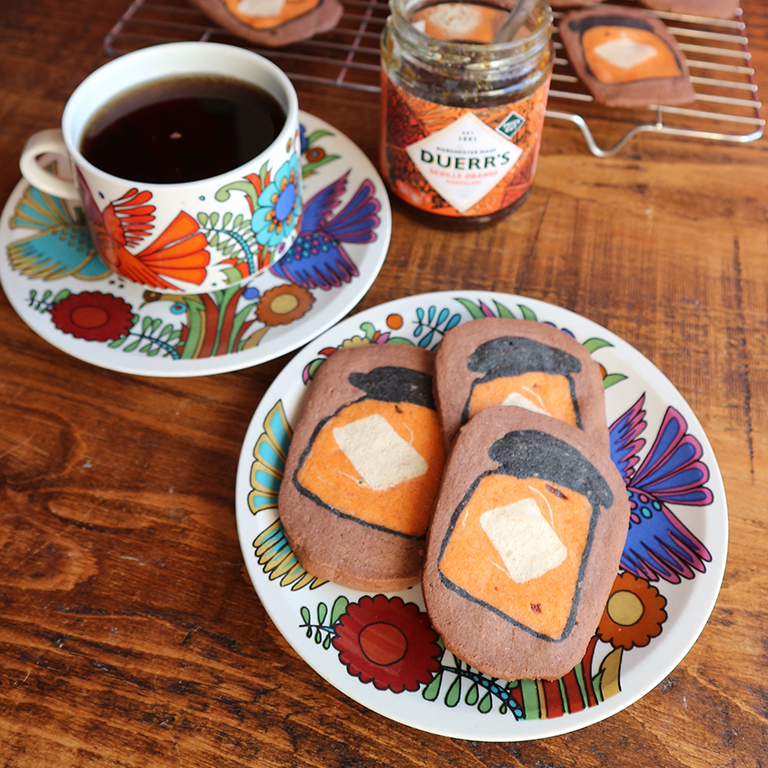
Hellie’s Duerr’s Marmalade Masterpiece – Duerr’s Marmalade Jar Biscuits
Ingredients
- 200g butter at room temperature
- 1 tsp vanilla extract
- 85g sugar
- 270g plain flour
- 2 tbsp Duerr’s Marmalade
- Gel food colouring, white, orange and black
- 1 tbsp cocoa powder
Method
- Firstly, draw a picture of the Duerr’s Marmalade jar that you would like to feature in the centre of your biscuit. Use this as a reference when structuring your biscuit, leave to one side.
- Using your hands, mix together butter, sugar, flour and vanilla extract in a mixing bowl.
- When combined remove one third of the biscuit batter. Mix this with cocoa powder, pop to one side and save for later.
- With the other two thirds of biscuit batter, add your Duerr’s Marmalade and mix together. If the consistency of your dough becomes too wet, add a little more flour. Work the mixture into a texture that binds well. Be careful not to add too much flour as the batter will start to crumble.
- Divide your marmalade batter again into three sections. Add black food colouring gel to your first section. To the second add white and to the third orange.
- Now, this is where things get a little tricky. Mould your white biscuit batter into a long sausage. This will be the diamond label on the Duerr’s Marmalade jar. Put this into the fridge for 10 minutes.
- Whilst your white biscuit batter is cooling, divide your black biscuit batter into two sections. One section will make the lid, the second will be the outline of your jar.
- For the outline of your jar, use a rolling pin to flatten your batter out into a thin rectangle. Place some baking paper or cling film underneath to stop your dough from sticking.
- Now, the lid. Take your remaining black biscuit batter and roll a second sausage the same length as your white batter but with a rectangular front and back.
- Remove your cold, white batter and cut it so it resembles a cuboid. This will give you square ends, turn this slightly to reveal a diamond shape.
- Cover the white, diamond batter by wrapping the orange batter around it, being careful to maintain the diamond shape in the centre and making sure it is still visible. Fill in the edges and grooves to shape in the next step.
- Once your white batter is wrapped in orange the orange batter, mould this into a jar shape (rectangular). Try to make this about the same size as the previously moulded black jar lid.
- Put the above into the fridge for 20- 30 minutes.
- Once firm, remove from the fridge and place on top of the jar outline (rectangle created in step 8). Use the cling film or baking paper underneath your outline to help wrap your outline around your orange and white biscuit batter. Once covered, pop on your marmalade jar lid and put your mould into the fridge.
- Remove your mould from the fridge after 30 minutes. Grab your cocoa batter from step 3 and roll it into a large rectangle. Take two sections from this and fill the space where the jar and jar outline are separated. Once filled use the remaining cocoa batter to cover the remaining black, orange and white dough.
- Once fully covered, shape your biscuits into your preferred shape, circle or rectangle.
- When happy with your biscuit shape, put your batter into the freezer to solidify.
- When solid, remove your batter from the freezer and heat your oven to 175°C.
- With a sharp knife cut your biscuit into 1/2cm slices. Any thinner your biscuits will burn, too thick and they won’t bake through.
- Line a baking tray with grease proof paper and add your slices.
- Put your biscuits into the oven for 10-12 minutes – keep an eye on them to ensure they do not burn.
- Once baked, leave to cool, give yourself a pat on the back, make a cup of tea and enjoy!
Twitter: @hyperism
Instagram: @swede_in_the_garden_city